


Description
Hope you enjoy it, and try as many variations to it as you can. It’s the best way to learn!
Ingredients
-
140ml whole milk
-
140ml water
-
120g butter
-
10g sugar
-
3–4g salt
-
175g bread flour or all-purpose flour with protein additive (sifted)
-
4 or 5 eggs
Instructions
Before starting
-
Preheat your oven at 400 F (200 ºC);
-
Take the eggs out of the fridge so they are at room temperature when needed;
-
Prepare a piece of parchment paper the size of a big rectangular baking pan.
Dough
-
Heat milk, water, butter, salt and sugar in a saucepan until the butter is boiling over the liquids;
-
Remove the saucepan from heat and incorporate the flour all at once;
-
Put the pan back in the stove, and start stirring with a wooden spoon without stopping, keep mixing while the flour starts cooking, there shouldn’t be any clumps of flour in the mixture;
-
To know when your dough is ready you have at least 2 different methods:
-
The first one is to check the bottom of your pan, there should be a think coat of dough sticked to it. This does not always work because some pans are non-stick;
-
In that case, go for the scientific way: use a thermometer! It should read 170 F (75 ºC) when ready.
-
-
Once the dough is ready, remove it from the heat and let it cool. It will be ready for the eggs as soon as it reaches 60 ºC or less. You can also check the temp by inserting your hands in the dough. It should feel warm but not as much to burn your hands;
-
The eggs can be incorporated and mixed either by hand or using a stand mixer. I have to say that I’ve tried both and doing it by hand is tough, but it’s a great exercise to understand how the texture of your dough is. In both cases always add 1 egg at a time and keep mixing until the egg is completely incorporated and the dough is homogeneous again. Don’t try to add all eggs at once and always check consistency before adding the next egg;
-
Note on consistency: This recipe calls for 4 eggs, but given that eggs can vary in size please check the consistency before adding each extra egg. The method I use is to grab a small portion of dough between my thumb and index fingerprints and start separating them, the dough should break after separating them 2cm or more. If it breaks before it’s too runny.
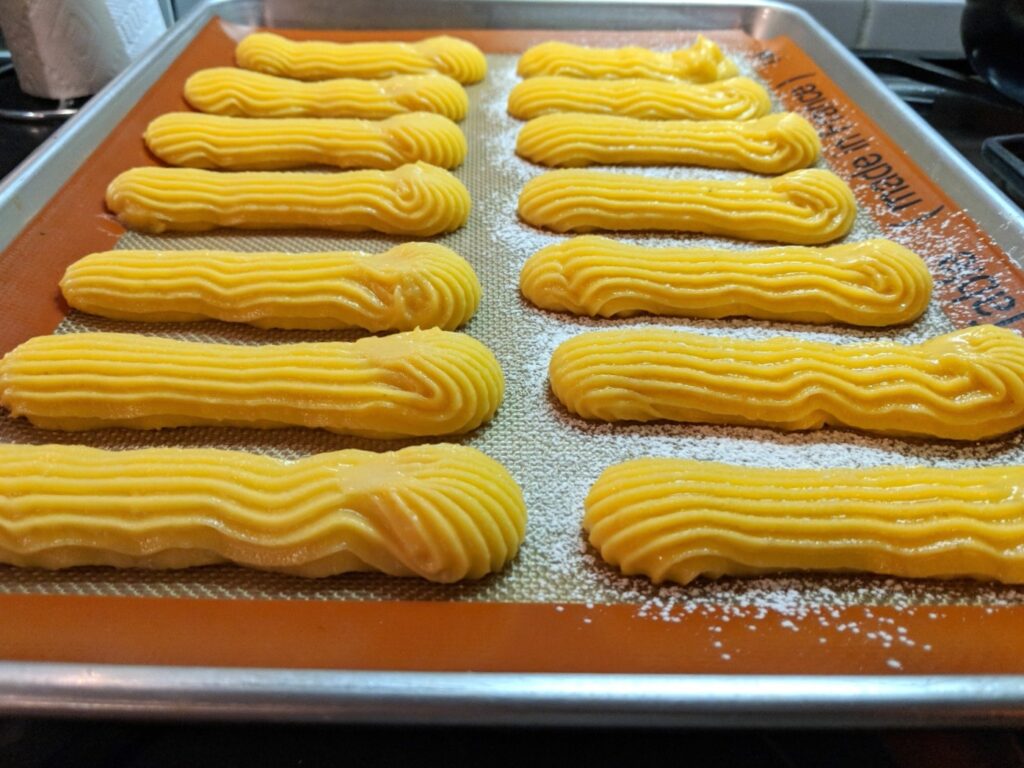
Piping
-
Use a large rectangular baking pan or cookie sheet and line it with parchment paper. A good idea to avoid the paper sliding, is to stick it with a bit of dough to the baking pan;
-
Using the open star tip, fill up a piping bag up to ⅔ of it with the finished dough.
- Pipe each Eclair without stopping, making the tips of the Eclair larger than the body. Each Eclair should be approx. 12 cm tall and 3 cm wide. Give a space of 4cm between Eclairs;
Baking
Before: you can sprinkle some icing sugar on top to have a nice caramelized effect in the oven. Also an egg-wash is possible but it might crack the Eclair, so its more risky in my opinion.
-
Start the baking at 400 F (200 ºC) and bake for 20 min approximately
-
Lower the temperature of the oven to 300F (160 ºC) and bake until the Eclairs are completely brown. If the colour is too light you should continue baking. I am not giving times at this point because each oven is different and you should learn the exact point of your cooking by looking at the pastries;
-
Don’t open the oven any time before you think the Eclairs are ready!
-
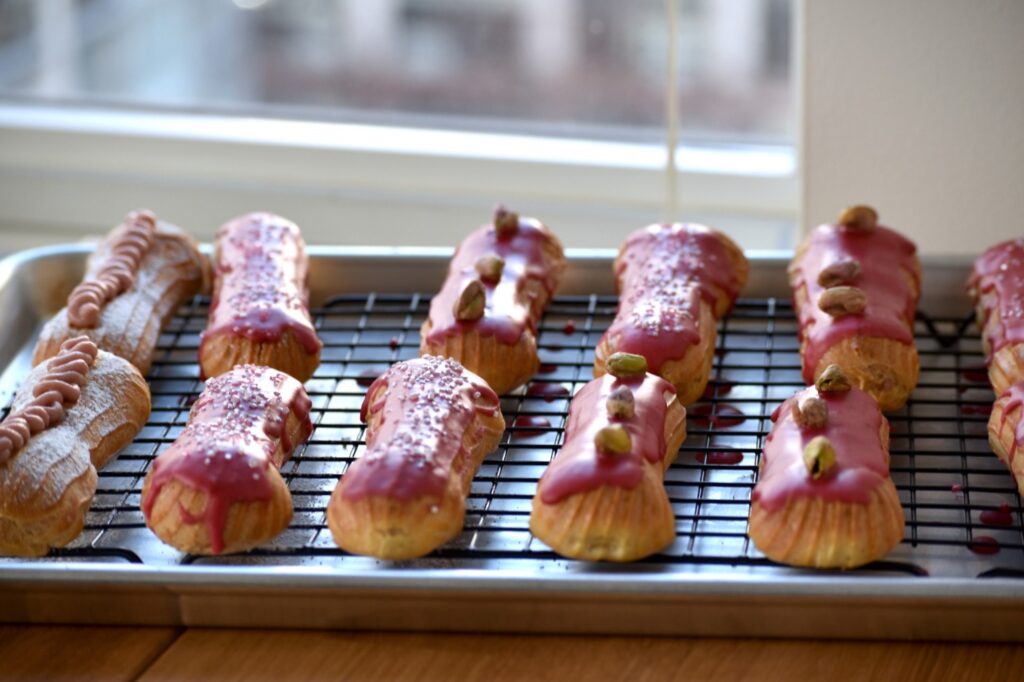
Remove them from the oven and let them cool completely before filling and glazing.
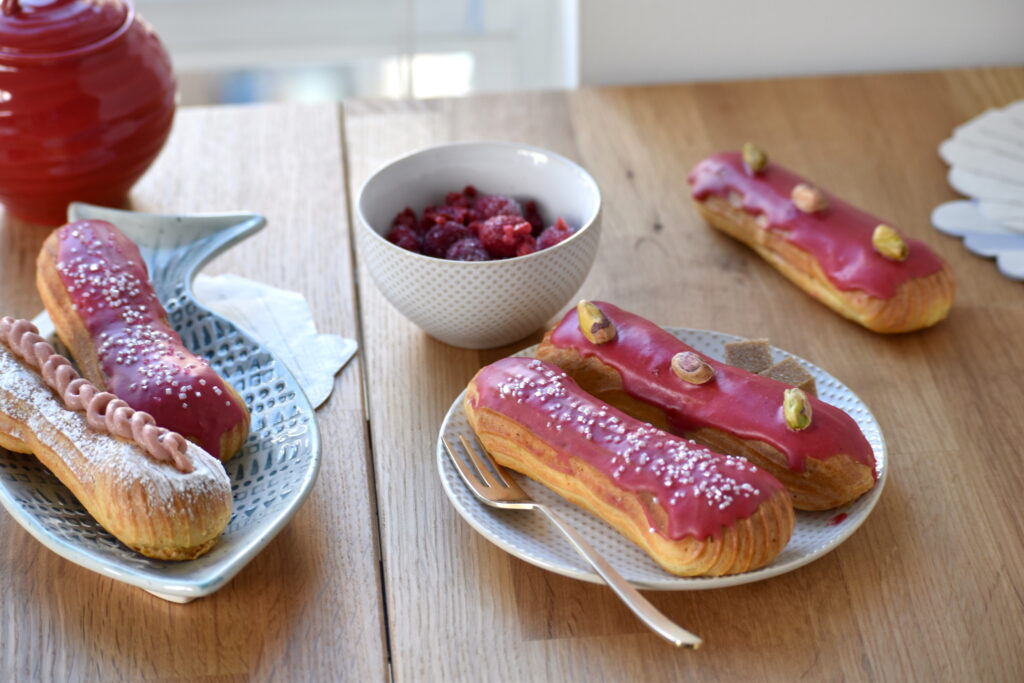
Filling
I am not adding the recipe for the filling in this post to avoid it being extra-long. Any recipe for custard will work really well: chocolate, vanilla, any fruity or nutty custard, there are a million options. I’ll post the recipe of my Raspberry Custard very soon. In the meantime the internet is your friend!
My recommended methods for filling are 2:
-
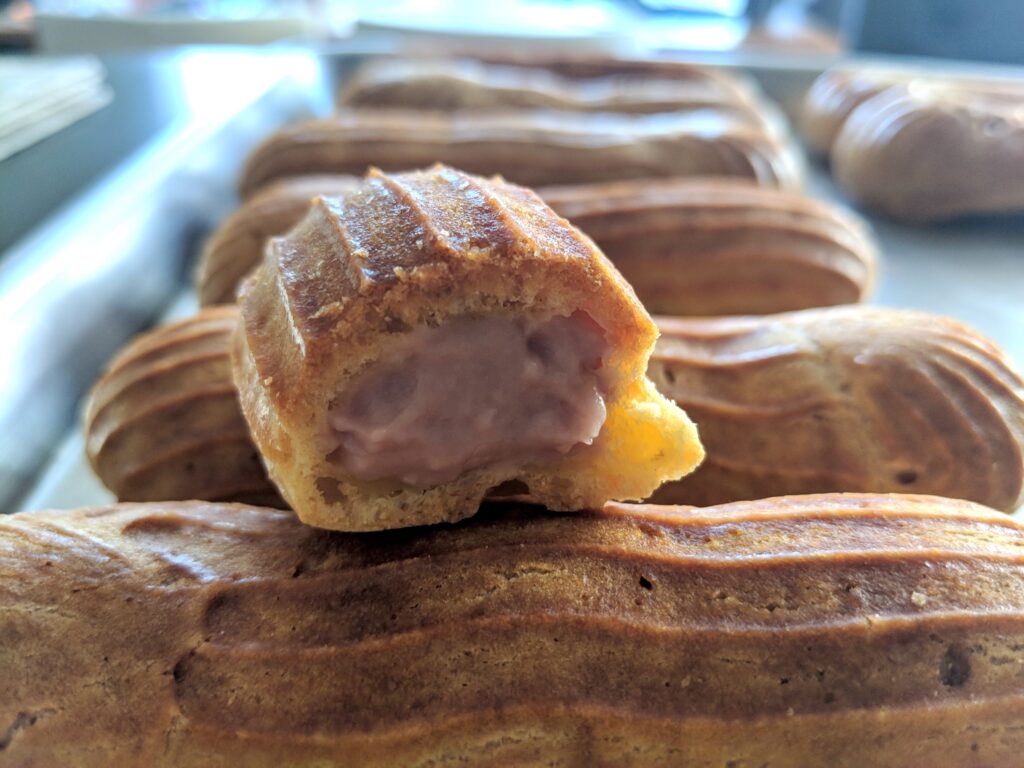
Closed Eclair: in this method the filling won’t be seen until the Eclair is cut. Make 3 small holes in the bottom part of your eclair, they should be big enough to fit a small piping tip
-
Open-face eclair: cut your Eclair almost in half lengthwise (leave the last part joint). With a piping tip of your preference (the ones with shapes look really cute on this type of Eclairs) fill you eclair so the filling can be perfectly seen but does not overflow. I don’t have a picture for this but here you have one, you get the idea.
Notes
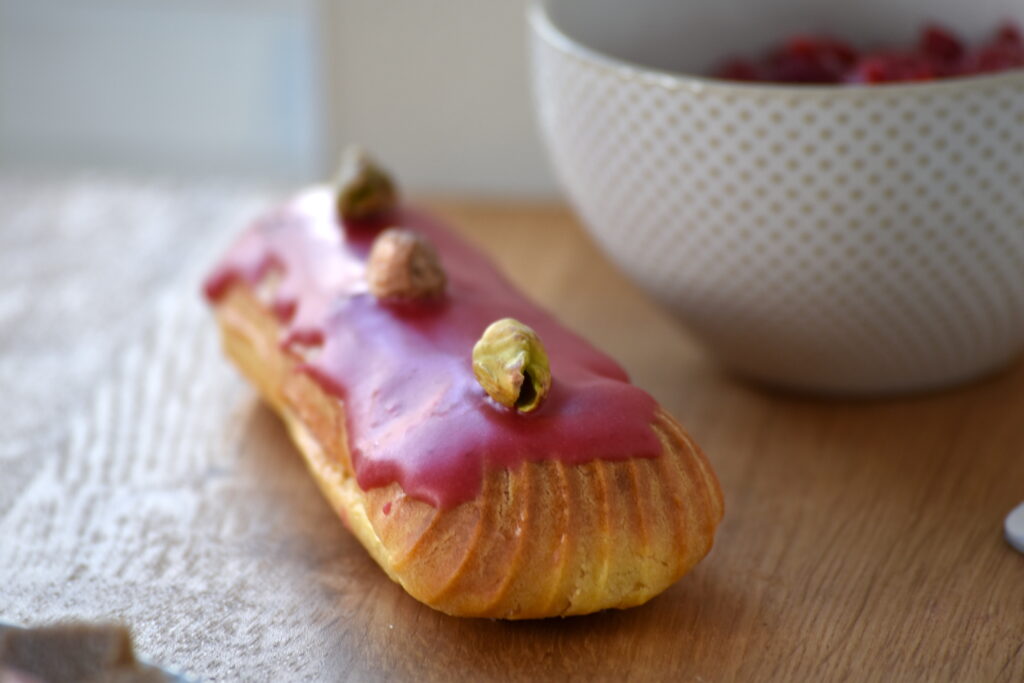
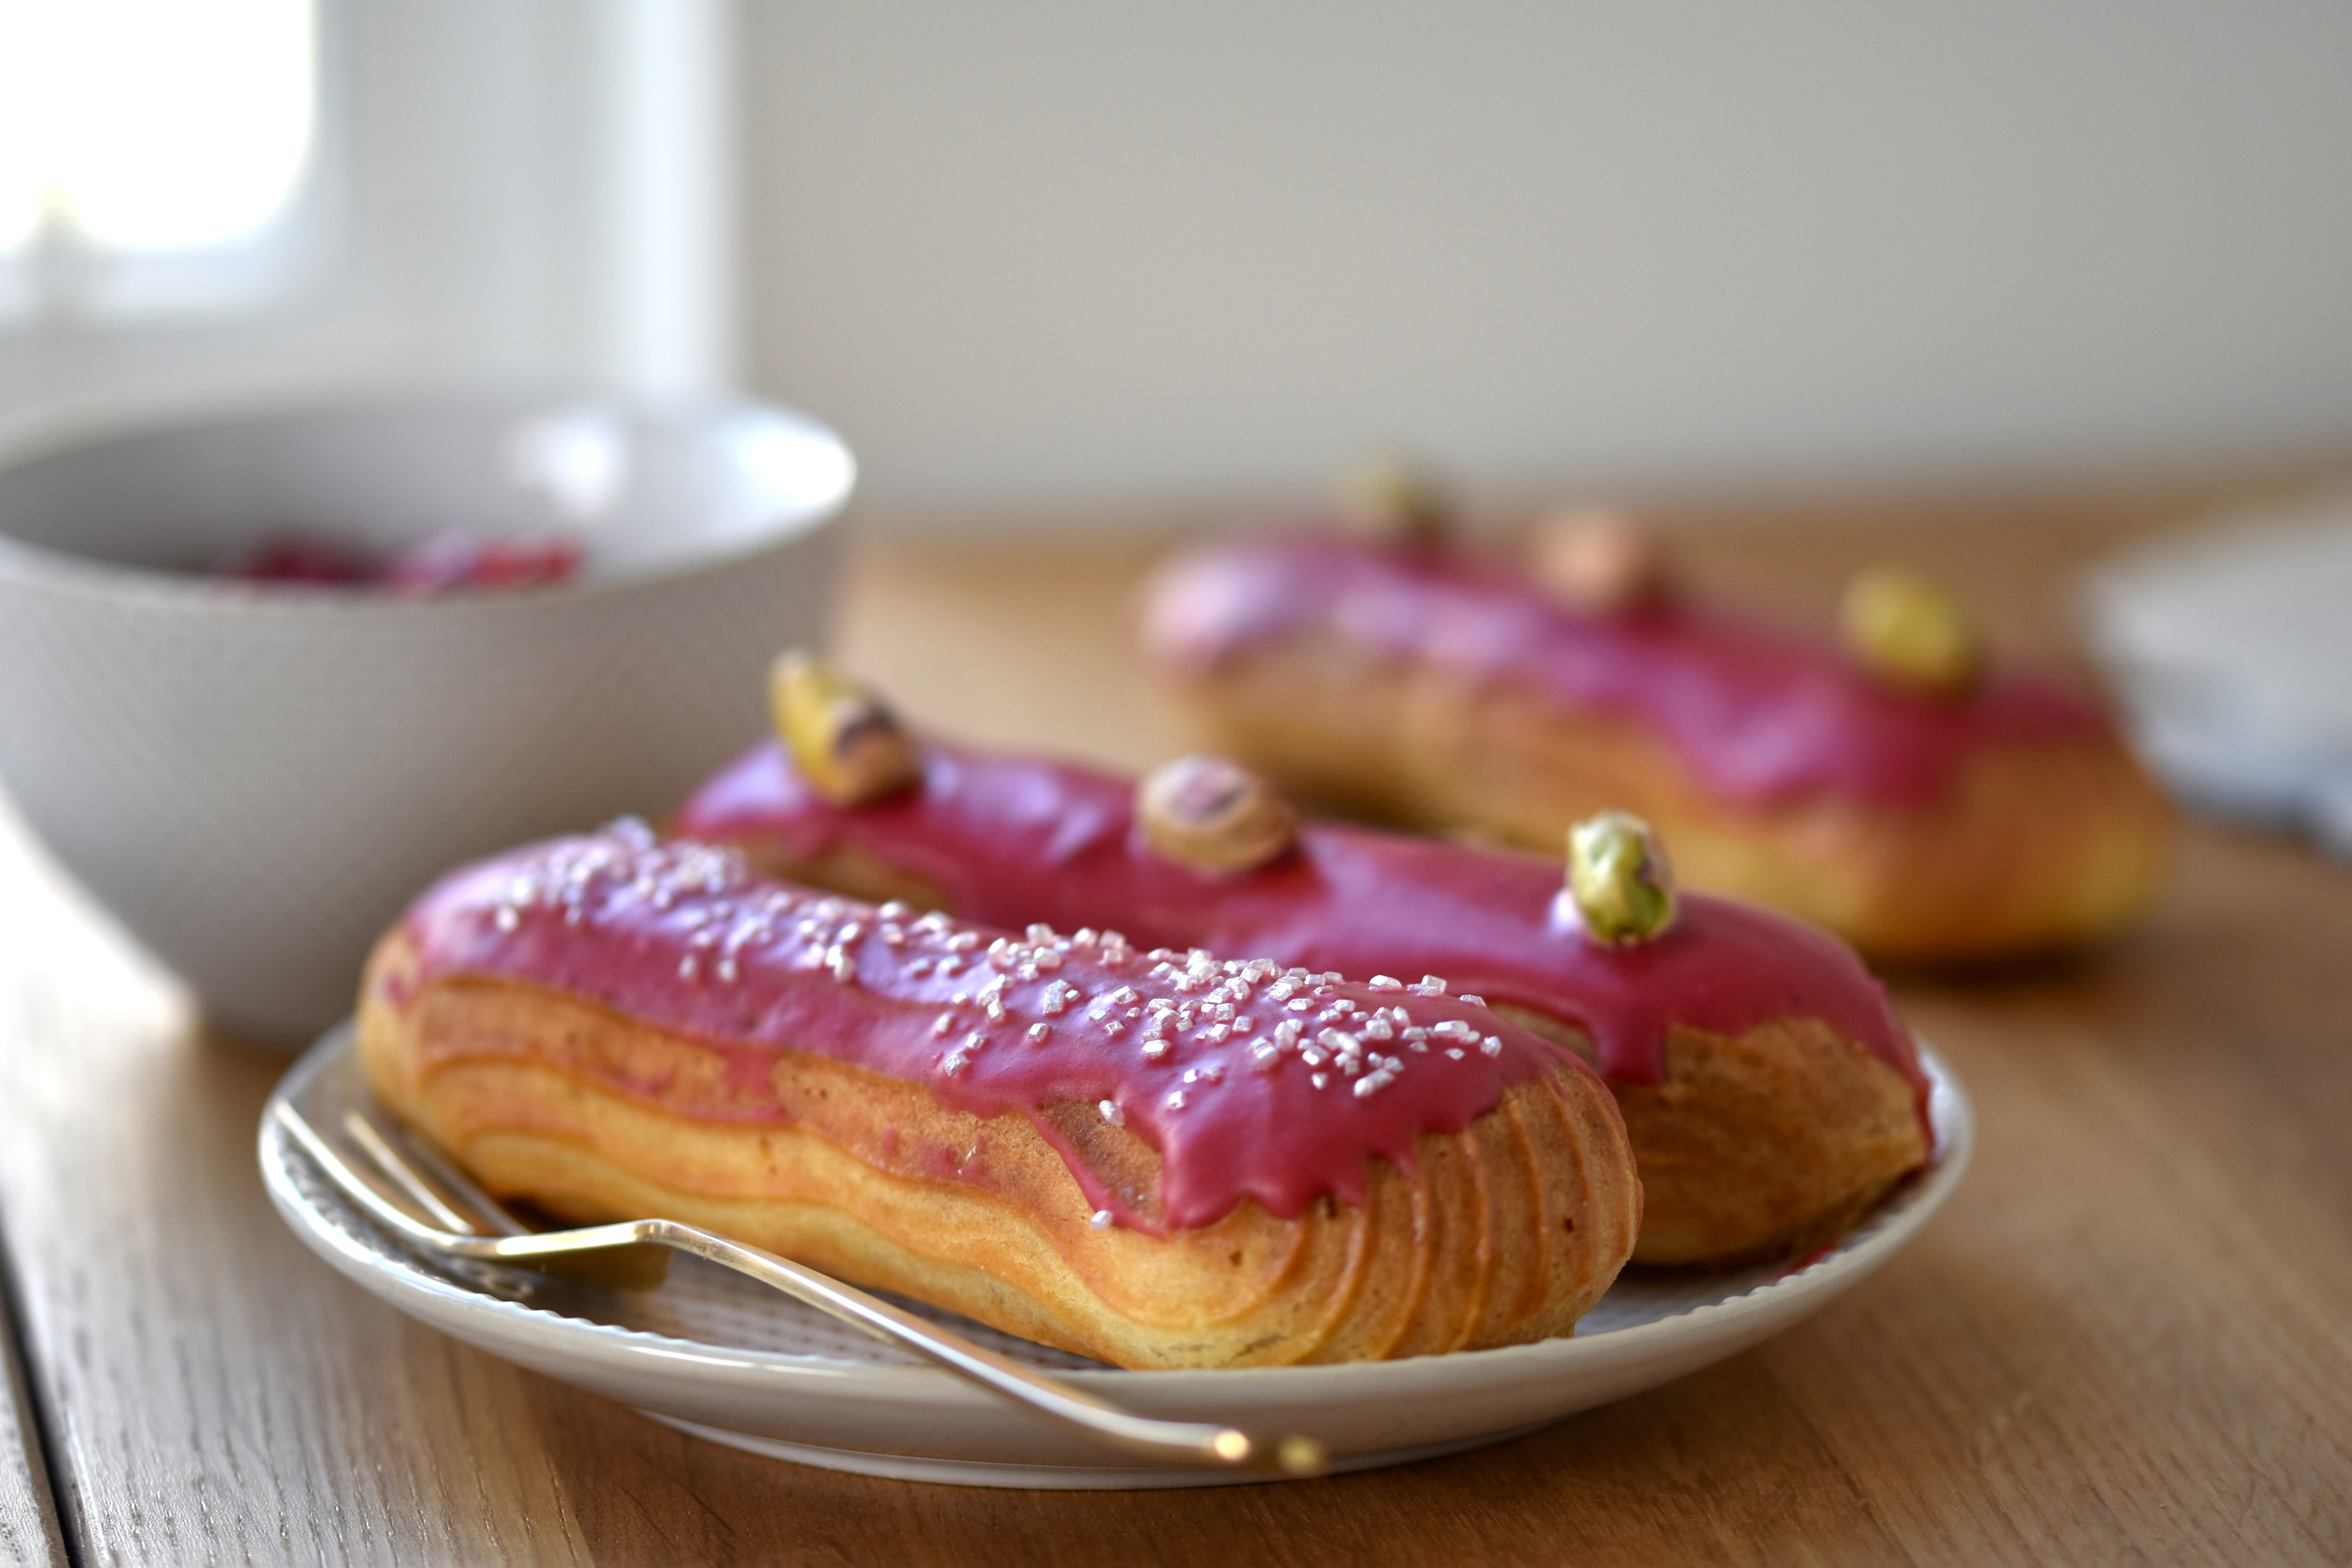
- Extra ideas: before piping you can split the dough in parts, add different food gel colours to each (1 or 2 drops each at most) and mix until colour is uniform.
- Sources and Inspiration: My sources are diverse, I’ve first learnt how to make Choux Paste at cooking school and then I made a specific Eclair workshop in my city where I’ve learnt most of the things I used in this blog post. But I also like to enrich myself with other views, and I usually read lots of blogs and recipes before baking, trying to find the best ingredient balance and the one that looks more reasonable. In my search I found IronWhisk blog which has a great Eclairs post which I highly recommend to reading. Also I like to read how high-end pastry chefs cook their best creations, like Christophe Adam which owns the brand L’ Eclair de Génie with several stores around the world. There are plenty of chefs out there and most of them have recipes of eclairs in their repertoire. I recommend reading some of them to get ideas for flavours and fillings.
- Prep Time: 70 min
- Cook Time: 20 min
- Category: Pastries
- Method: Oven
- Cuisine: French